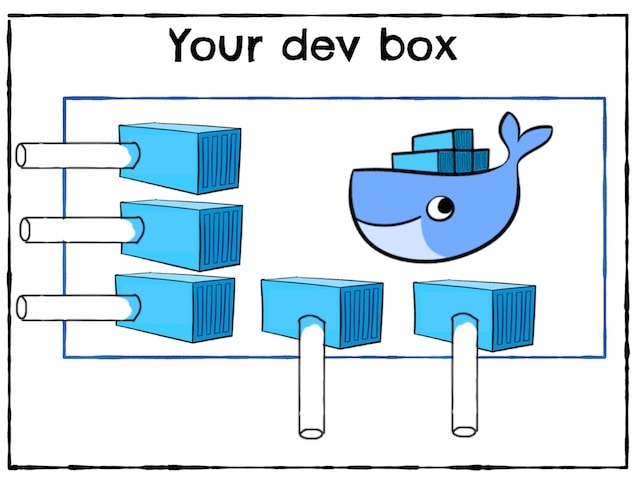
Containerizing development environment seems to be good for several reasons:
- Development can be held on any host -
LinuxandWindows- in the same manner - Environment is shipped as ready-to-work bundle: all needed OS-packages, compilers, tools are pre-installed
- Additional third-party software, including databases, message-brokers, proxies, caches, and side-services can be bootstrapped in an automated manner in seconds.
This article will dive into creating simple development environment using Docker Compose (and optional - VSCode Remote Tools)
Demo task
As a simple showcase, we’ll try to containerize the environment for scaffolded Phoenix application.
It’s a good start because we’ll:
- we’ll make a special container to development purposes, which will hold
Elixirruntime - we’ll make a separate container for our database, and configure the connection between containers
- use
VSCodeandDocker-Composein order to orchestrate and easy-access containerized development environment.
We’ll scaffold the project with easy next in the article
Prerequisites
NOTE: VSCode Remote requires VSCode Insiders installation.
You can skip the section if you already have docker-compose and code-insiders installed, and you are sure with your Elixir skills.
Docker-compose
Docker-compose ships with docker package. You can follow official instructions in order to install docker-ce,
which will contain everything that we need.
VSCode
While VSCode Remote is in early-access now, this extension requires VSCode Insiders installation. You can have both VSCode and VSCode Insider on the same machine.
Install it using these instructions. We’ll call it from the command line like this:
$ code-insiders
and will continue calling VSCode with:
$ code
Elixir runtime
For sure, you have already installed Elixir on the host. If not - you can read here how to do it.
We’ll need to have the Phoenix installation completed also. Follow these instructions to do it.
Creating an application
We don’t want to spend a lot of time on coding (only for this article, of course), so we will make empty Phoenix application.
$ mix phx.new vscode_remote
You can resolve the dependencies now, or do it in our future container.
Composing
Let’s start with the simplest idea:
We need to containerize our
PostgreSQLinstance, in order to not mess different databases from a different project on one localPostgreSQLinstance
To do this, we’ll create a simple DockerCompose configuration file with only one service: our DB:
NOTE: You can read the reference to the docker-compose here
The file will be put in the project’s root, for simplicity:
# ./docker-compose.yml

version: '3.7'

services:
  postgres:
    image: postgres:11.3-alpine
    container_name: vscode_remote_postgres
    restart: always
This config is simple, but we’ll add some tweaks to beautify the solution.
Access from the host
It can be useful to connect from the host to our new DB instance. For example, we can use
different GUI tools, like PgAdmin or any others ( no advertising here:) ).
So, we need to map the ports of our container to the host.
Our first solution can be implemented like:
    ports:
      - 5432:5432
but it has some problems.
For example, our host can have it’s own PostgreSQL instance, which is already running on 5432 port.
Thus, let’s remap the port to resolve conflicts:
    ports:
      - 15432:5432
Now, we can access both HOST and CONTAINERIZED instance of PostgreSQL
The resulting config will be:
# ./docker-compose.yml

version: '3.7'

services:
  postgres:
    image: postgres:11.3-alpine
    container_name: vscode_remote_postgres
    restart: always
    ports:
      - 15432:5432
Caching
Another great tweak will be cache data(in other words content of the DB) across container lifetime.
In this case, we can freely destroy containers and create them again, but the data, we are using during development
will be persistent.
Fairly saying, we using migrations and seeds (or at least - MUST use them), in order to immediate bootstrap development data in the case that something went wrong. But, we still can use both mechanisms here.
Volumes is a great instrument to do this.
PostgreSQL stores its data and config inside the single folder, and we’ll map it to host in order to persist it.
volumes:
  - ./docker/data/postgres:/var/lib/postgres/data
We’ll map volume inside:
dockerfolder, so we can remove all containerizing at oncedatafolder, so all containers information (Dockerfile’s, etc.) will not be touched if we want to ERASE ALL DATApostgresfolder, so we can use separate data folders for other services (for exampleelasticsearch)
The resulting config will be:
# ./docker-compose.yml

version: '3.7'

services:
  postgres:
    image: postgres:11.3-alpine
    container_name: vscode_remote_postgres
    restart: always
    ports:
      - 15432:5432
    volumes:
      - ./docker/data/postgres:/var/lib/postgres/data
Also, we don’t want all this data to go inside our repository, so we need to modify our .gitignore a bit.
# .gitignore

...

docker/data # so we still tracking all Docker's info except data
Using
Now, we already can use this configuration for containerized development!
We’ll run the software on the host machine but connect to the database inside the container.
Let’s build environment with:
$ docker-compose up -d
-d flag here starts the environment in detached mode.
You can now notice, that ./docker/data/postgres folder is created. All PostgreSQL data cache will be stored there.
Now, we need to rewrite default Phoenix config (in Ecto section), to navigate these libs
connect to the docker container.
Let’s change ./config/dev.exs in root folder:
# ./config/dev.exs
...

config :vscode_remote, VscodeRemote.Repo,
  username: "postgres", # check user - "postgres" is default for the container
  password: "postgres", # check pass - "postgres" is default for the container
  database: "vscode_remote_dev",
  hostname: "localhost",
  port: 15432, # we are adding this line only
  show_sensitive_data_on_connection_error: true,
  pool_size: 10

...
Run
$ mix ecto.create
$ mix ecto.migrate
in order to ensure that everything works as expected.
Application container
Next idea is:
Let’s create container to store all our development environment: Elixir and Erlang installations, git, etc.
This case will differ a bit from previous: we’ll create our own Dockerfile, so we’ll have better control of what is going inside the container.
Composing again
First, let’s define new service inside docker-compose.yml
app:
  build:
    context: ./docker/dev
    dockerfile: Dockerfile
  container_name: vscode_remote_app
Here we are not specifying image, either we are specifying the build section. We are telling DockerCompose to build a new container
from Dockerfile, that is located inside ./docker/dev folder. All the details about the container will be specified there.
Now, again, some tweaks.
Mapping the port
We again need to map a port - but now HTTP Server’s port, in order to view running a web application with a browser of our host.
ports:
  - 4000:4000
Now, when we’ll navigate the browser to http://localhost:4000, it’ll eventually hit the web server inside container.
Depending
It’s a good idea to add container dependencies list to this container, to ensure that app will be started ONLY after them.
For now, it’s only postgres, but in the future, it can be something else.
depends_on:
  - postgres
Adding volumes
We’ll add several volumes so the starting instance will contain everything we need to work.
volumes:
  - .:/workspace
  - ~/.gitconfig:/root/.gitconfig
  - ~/.ssh:/root/.ssh
Firstly, we map our project’s folder inside the workspace dir in the container. So, the project will be there, when we’ll start to work.
Every change in the files will be propagated to and from the container.
Secondly, we need to map our git configuration: nobody wants to write git username and git email every time when container rebuilds.
Thirdly, we are mapping the ssh configuration, thus we can use RSA keys for remote access to our servers and repositories directly from the container!
Starting command
We don’t need that something will work inside our container - it’s used ONLY for development proposes. So, we are creating a simple stub task,
that will not let container die, but the development process will be performed with executing bash shell on a running container.
command: sleep infinity
The resulting config will be:
version: '3.7'

services:
  postgres:
    image: postgres:11.3-alpine
    container_name: vscode_remote_postgres
    restart: always
    ports:
      - 15432:5432
    volumes:
      - ./docker/data/postgres:/var/lib/postgres/data
  app:
    build:
      context: ./docker/dev
      dockerfile: Dockerfile
    container_name: vscode_remote_app
    ports:
      - 4000:4000
    volumes:
      - .:/workspace
      - ~/.gitconfig:/root/.gitconfig
      - ~/.ssh:/root/.ssh
    command: sleep infinity
    depends_on:
      - postgres
Now, let’s move on and create Dockerfile for the image!
Dockerfile entrails
First, we need to understand, what do we basically need from the environment:
Elixirruntime andErlangruntimeNodeJS(to usewebpack, asPhoenixuses it by default)Yarn(this step is optionally, but I suggest to useYarnfor development purposes)
You can read Dockerfile reference here to better understand what we are doing.
A good start - is a way to success! One can use official Elixir’s image as a good start.
FROM FROM elixir:1.8.1
The image is based on Ubuntu, so it seems that most packages are already installed. We just need to add NodeJS and Yarn:
RUN curl -sL https://deb.nodesource.com/setup_12.x | bash - \
    && DEBIAN_FRONTEND=noninteractive apt-get install -y nodejs \
    && rm -rf /var/cache/apt \
    && npm install -g yarn
That’s it! BUT Let’s also add some tweaks.
Language specification
iex shell requires UTF-8 shell encoding to work properly. Unfortunately, it’s not defined in our default container
(probably because it’s not expected to be used as a development machine). Let’s do it by ourselves.
Firstly, locales package should be installed, this can be done via apt
Secondly, some environment variables should be specified
RUN apt-get install -y locales
RUN sed -i -e 's/# en_US.UTF-8 UTF-8/en_US.UTF-8 UTF-8/' /etc/locale.gen
RUN locale-gen

ENV LANG en_US.UTF-8
ENV LANGUAGE en_US:en
ENV LC_ALL en_US.UTF-8
NodeJS (and not only) native extensions requirements
Both NodeJS (more) and Elixir (less) use packages with native code - generally in C/C++ with
some bindings to the platform.
The container should know how to build them - so we need to add some more packages via apt
RUN apt-get install -y gcc g++ make
Mix/Rebar
It’s a good idea to install local copies of Mix and Rebar because we can’t develop without them.
RUN mix local.hex --force && mix local.rebar --force
Notify-Tools
The last great piece of Phoenix development - inotify-tools. Phoenix utilizes this package in
order to track changed files and perform hot-code-reloading during development. Installation via apt
RUN apt-get install -y inotify-tools
The resulting file will be:
FROM elixir:1.8.1

ENV LANG en_US.UTF-8
ENV LANGUAGE en_US:en
ENV LC_ALL en_US.UTF-8

RUN curl -sL https://deb.nodesource.com/setup_12.x | bash - \
    && DEBIAN_FRONTEND=noninteractive apt-get install -y nodejs locales inotify-tools gcc g++ make \
    && rm -rf /var/cache/apt \
    && npm install -g yarn \
    && mix local.hex --force \
    && mix local.rebar --force \
    && sed -i -e 's/# en_US.UTF-8 UTF-8/en_US.UTF-8 UTF-8/' /etc/locale.gen \
    && locale-gen
Running the household
We already know how to start the compose - with:
$ docker-compose up -d
Now, containers are up, and we can get inside our application container to start working:
$ docker exec -it -w /workspace vscode_remote_app /bin/bash
Great!
We are inside our container’s shell, with all the software we need for the development process:
$ elixir -v
$ erl -version
$ mix -v
$ node -v
$ yarn -v
$ git --version
Now, let’s start the Phoenix’s development server - and start hacking!
Configuring Ecto again
Now Phoenix application should access the database from the container, not from the host machine.
So, Ecto section should be configured again:
# ./config/dev.exs
...

config :vscode_remote, VscodeRemote.Repo,
  username: "postgres",
  password: "postgres",
  hostname: "postgres", # this hostname will be resolved within network
  # created by docker compose
  port: 5432, # port is changed - because 15432 is visible ONLY on host
  show_sensitive_data_on_connection_error: true,
  pool_size: 10

...
To ensure that everything is coupled, let’s run some migrations:
$ mix ecto.reset
And we are ready to fly!
$ iex -S mix phx.server
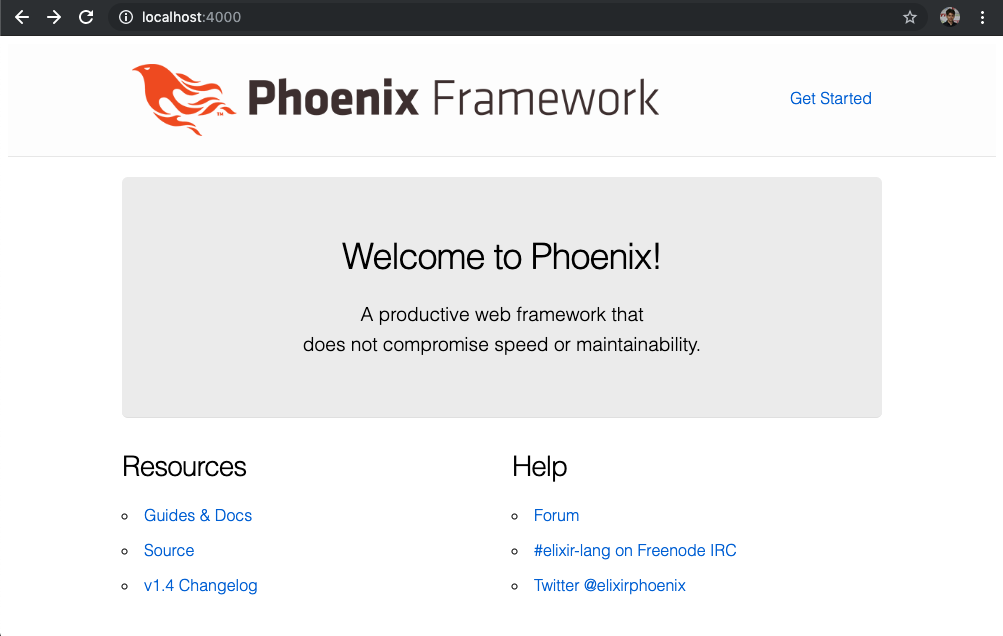
Navigate a browser on the host to see the welcome page. Congratulations!
VSCode for some more comfort
DISCLAIMER:
VSCode remoteis in early access now, and can change it’s config and API right now - while you are reading this post. It’s a very big chance, that you’ll need to adjust the next instructions by yourself - be ready to do this. NOTICE that you still can use all the previous part, because it is very stable.
We can move on a bit more and configure VSCode to run a containerized development environment for us.
Basically, we should have installed only two extensions:
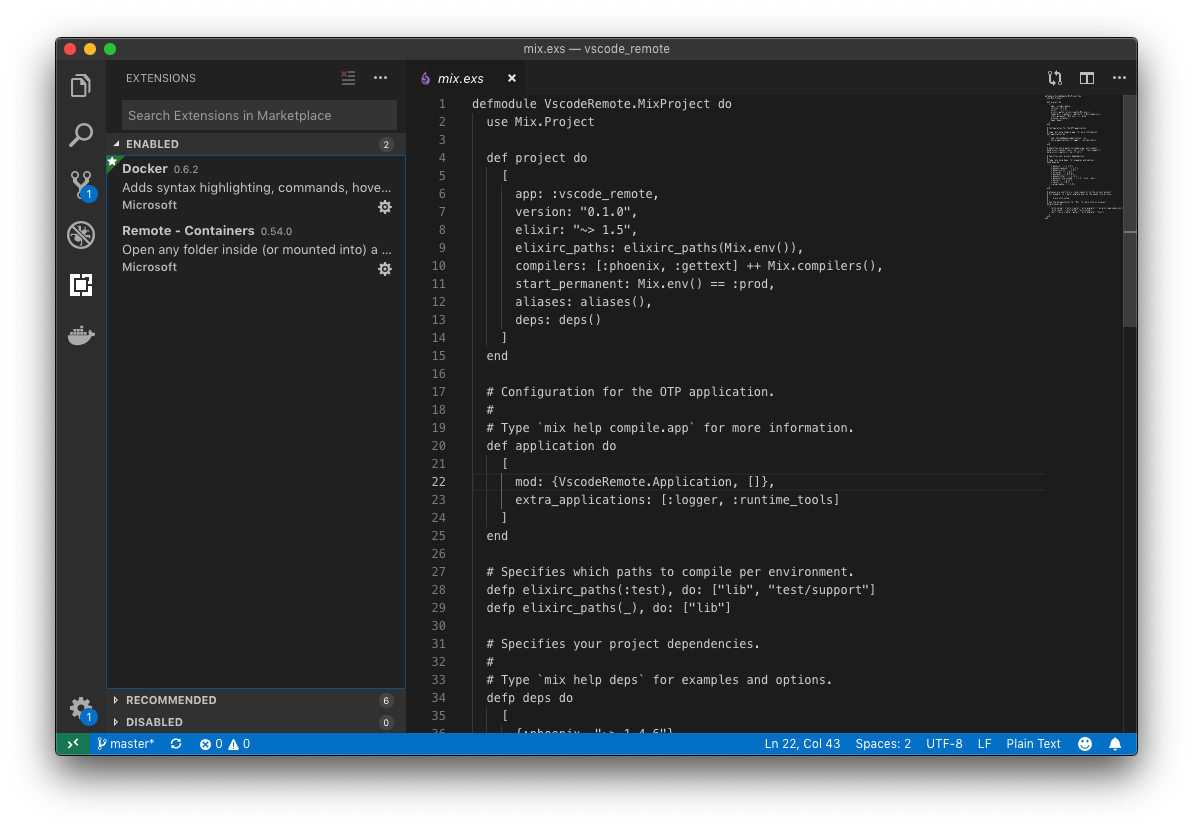
As you see, Remote extension adds a small green button in the down-left corner of VSCode. We’ll use it to control our development environments.
Also, we don’t have any Elixir, Phoenix, etc. extensions - because they can use the current installation of different compilers, languages servers, and tools,
but we want our development environment to be fully containerized - so we event don’t need Elixir to be installed on our host.
Devcontainer
Following these instructions, the process seems to be simple - we just need to define a configuration for Remote extension.
So let’s create ./.devcontainer/devcontainer.json file with some basic config:
{
    "name": "VSCode Remote",
    "dockerComposeFile": [
        "../docker-compose.yml"
    ],
    "service": "app",
    "workspaceFolder": "/workspace",
    "shutdownAction": "stopCompose"
}
For better understanding, what is going on here, you can check the API reference:
- Giving a name to our environment, so it will be inside the beautiful badge in
VSCodeinterface DockerComposefile path is relative - so it’ prefixed with../- Service specifies the container (from
docker-compose.yml), to which theVSCodeinstance on the host will be bind - While the
appfolder is volumed to/workspacefolder,VSCodewill be able to run environment right inside the folder DockerComposewill be stopped when theVSCodewill be closed.
Try to run the environment, pressing green button and choosing the Reopen folder in Container...
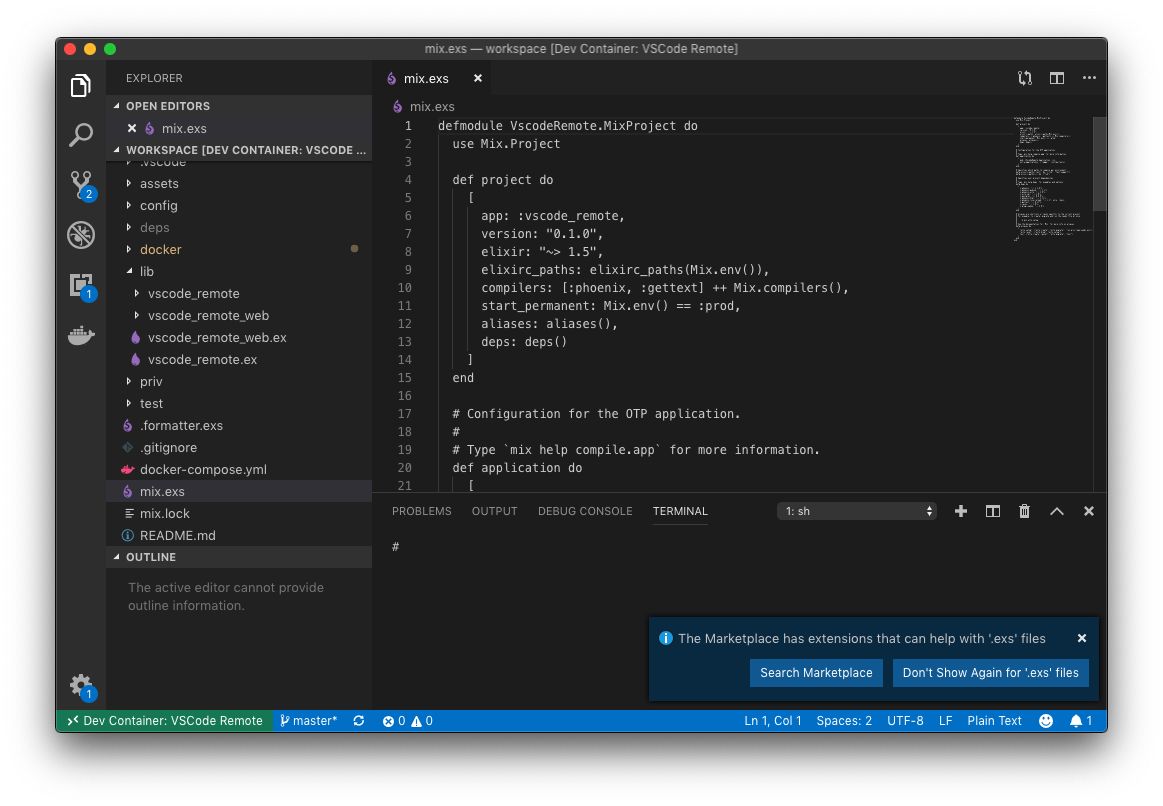
Everything is working… Almost. As you see, we still need to add some extensions inside our containerized VSCode.
Adding extensions
Let’s modify container’s config (./.devcontainer/devcontainer.json):
{
    "name": "VSCode Remote",
    "dockerComposeFile": [
        "../docker-compose.yml"
    ],
    "extensions": [
          "jakebecker.elixir-ls"
    ],
    "service": "app",
    "workspaceFolder": "/workspace",
    "shutdownAction": "stopCompose"
}
Don’t forget to add ElixirLs artifacts to .gitignore
...

.elixir_ls

...
Now, the container should be rebuilt (in general, all changes in Dockerfile, configuration and etc. should be followed with container rebuilding).
Press magical green button, and choose: Rebuild container...
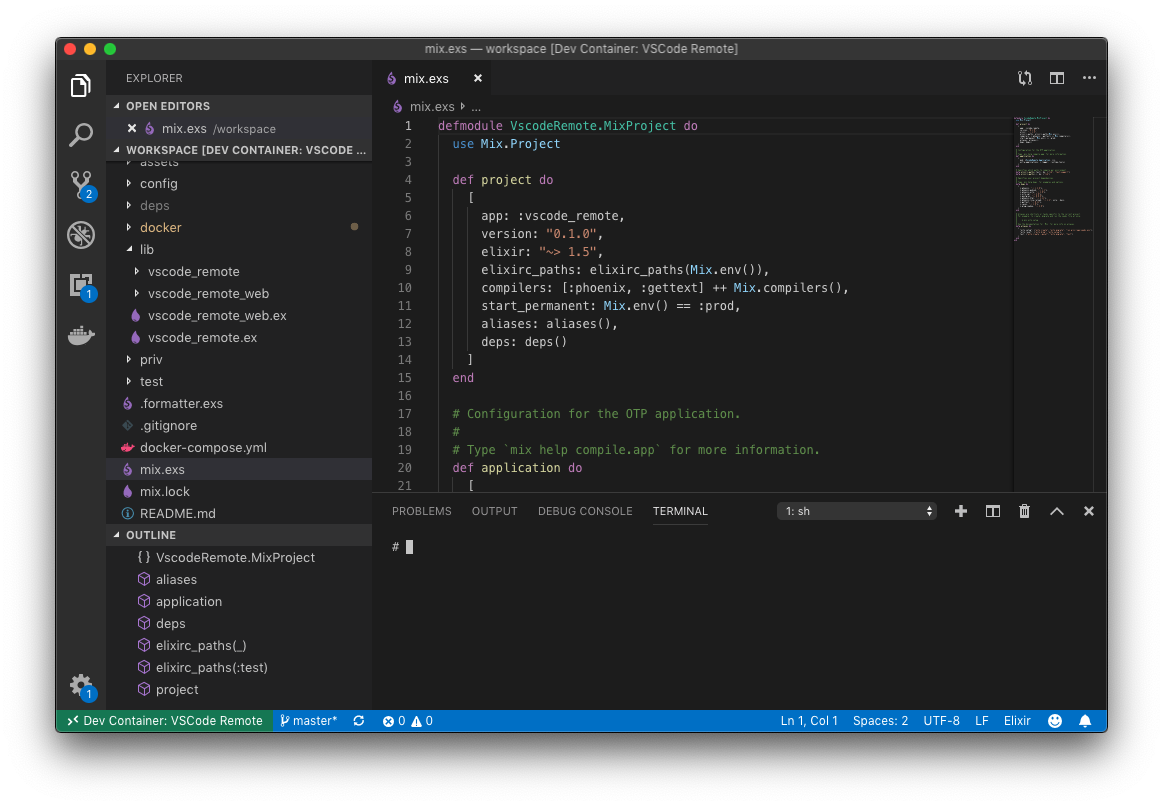
As you see, everything is up, and we can start hacking :)
Conclusion
Containerized development environment is very useful, while not mandatory: set it up if you’ll have some free time. You can find a repository that follows this article here
